Installation and Configuration Manual — MENNEKES AMTRON Professional
1. Introduction
1.1. Legal provisions
The information contained in these documents is the property of FENECON GmbH. Publication, in whole or in part, requires the written consent of FENECON GmbH.
Subject to changes and printing errors!
1.2. Qualification of the installing electrician
A qualified electrician is a person who has the necessary experience and training:
-
Setting up, switching on, switching off, disconnecting, short-circuiting and repairing circuits and devices
-
Standard maintenance and use of protective devices in accordance with current safety standards
-
First aid/emergency care
-
Current knowledge of local regulations, standards and guidelines
2. Product description
2.1. Prerequisites
The following is required to use the charging station:
-
FEMS App MENNEKES AMTRON Professional Read Access
-
MENNEKES firmware version 5.22 or higher
|
The "FEMS App MENNEKES AMTRON Professional Read Access" is not included in the scope of delivery. This must be purchased separately if not already available. |
3. Commissioning

|
To install the MENNEKES AMTRON Professional charging station, please follow the instructions in the "MENNEKES AMTRON Professional Operating and Installation Manual." |
|
This quick guide refers to the original user manuals. |
3.1. Ethernet connection
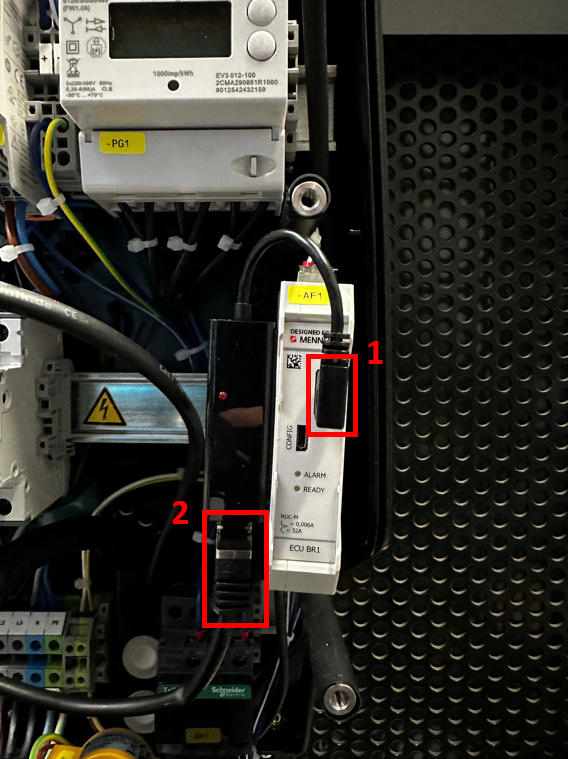
Once the charging station has been installed, it must be connected to the customer network via the "retrofit kit (USB Ethernet adapter)". To do this, connect the retrofit kit to the charging station via the USB port of the ECU (1) and the customer network to the retrofit kit (2) via the Ethernet port.
3.2. Settings via the MENNEKES web interface
-
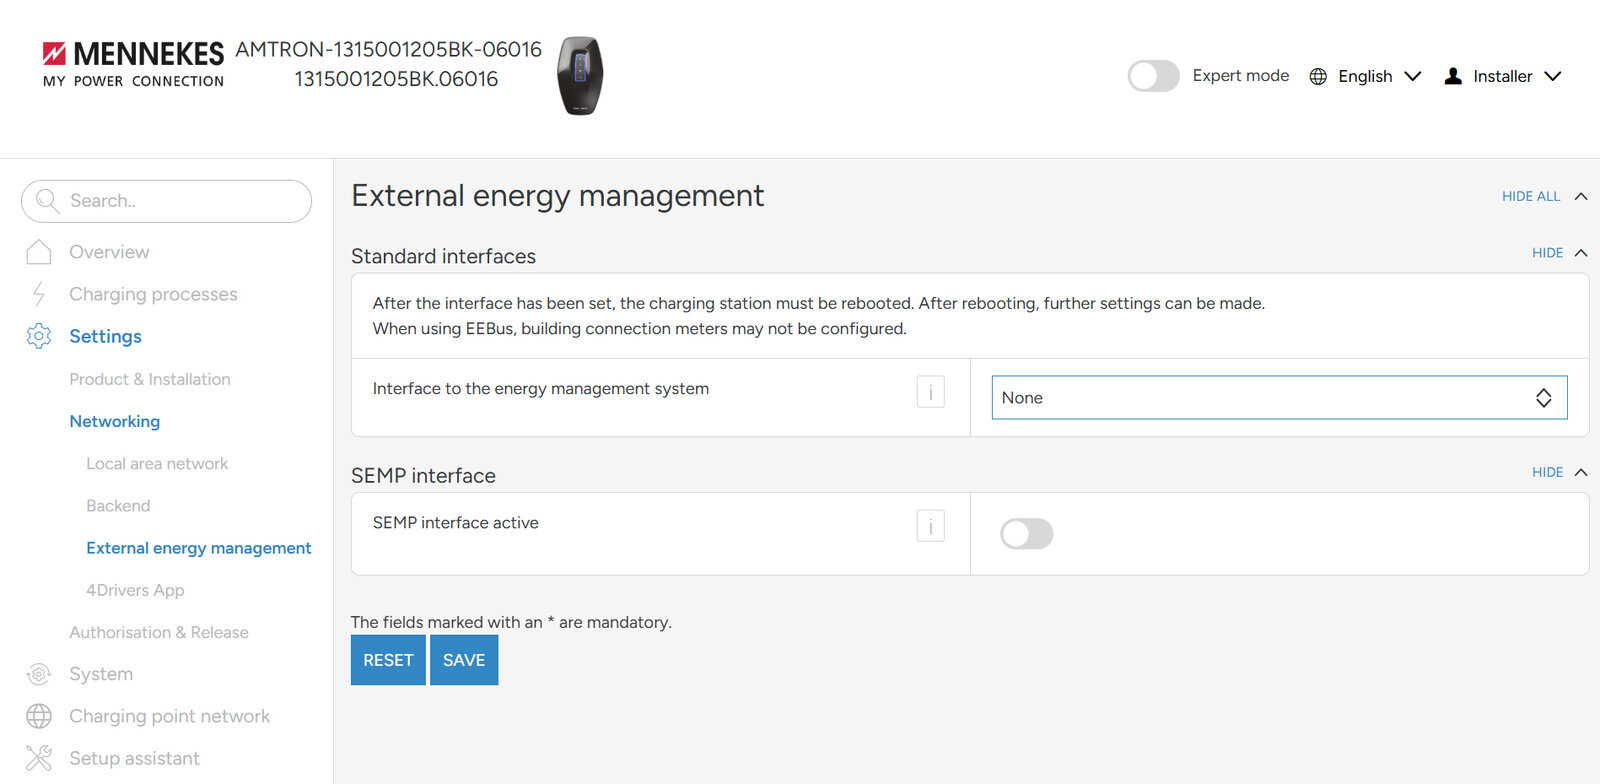
Log in to the MENNEKES charging station via the web interface and navigate to Settings > Networking > External Energy Management using the side menu:
-
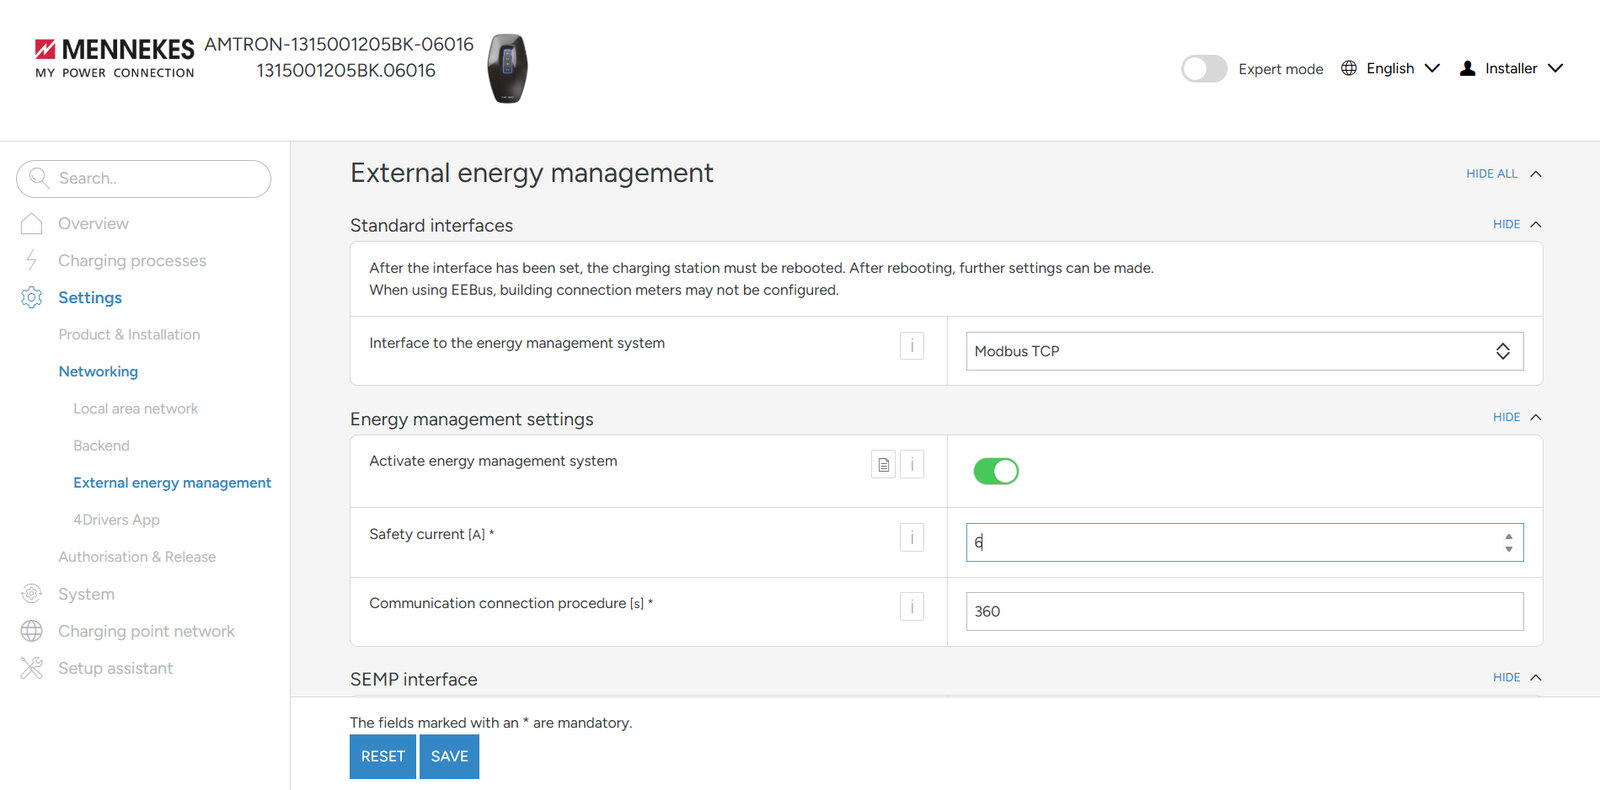
From the drop-down menu, select Modbus TCP as the interface to the energy management system.
-
Enable the energy management system by clicking the toggle .
-
The safety current should be set to 6 A. The timeout for the communication connection should be set to 360 seconds.
-
After you have made the settings, click SAVE.
-
Restart the charging station.
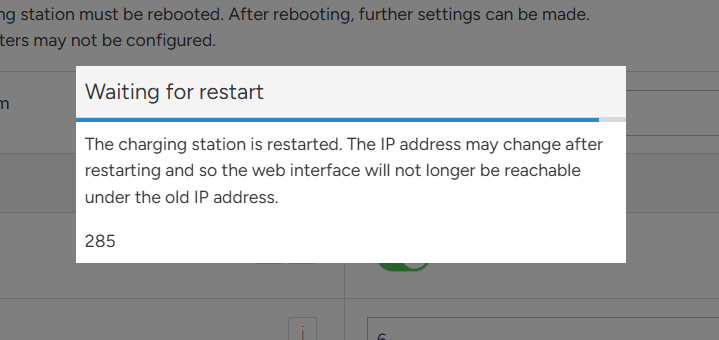
The configuration is now complete.
4. Install FEMS App MENNEKES AMTRON Professional Read Access
In the FEMS App Center you will find all installable FEMS Apps — such as the FEMS App MENNEKES AMTRON Professional Read Access.
|
The user manual FEMS App Center provides detailed instructions on how to use the FEMS App Center. It also explains how to register and redeem a license key. |
Then follow the instructions in the FEMS App installation wizard on your {box-name}.
4.1. Installation wizard
You will then be taken to the installation wizard for FEMS App MENNEKES AMTRON Professional Read Access.

Some of the input fields are pre-filled. Nevertheless, enter your data if it differs from the default values (e. g. IP address). Otherwise, the default values can be retained (e. g. port, Modbus unit ID).
| Mandatory fields are marked with * |
| Check your entries and make sure that they are correct. Otherwise the respective app will not work properly! |
Please enter the IP address and the previously set bus ID.
Use the arrow buttons to select the correct bus ID.

Then click on "Install app".

Once the installation process is complete, the new app appears in the overview of the FEMS App Center in the "Installed" category.
The FEMS App MENNEKES AMTRON Professional Read Access has been successfully installed.
4.2. Edit FEMS app
|
Apps that have already been installed can be edited later to change their configuration settings. To do this, select the app in the FEMS App Center overview and click the "Edit App" button. Detailed instructions can be found in the App Center User Manual: https://docs.fenecon.de/en/fems/app_center/App_Center.html#_fems_app_bearbeiten. |