Configuration Manual — KACO PV Inverter
1. Introduction
Manual 2026.9.1
These instructions are used to configure the following KACO PV inverters:
KACO |
TL3 Series
|
2. Configuration via the KACO Web Interface
Before integrating the inverter into FEMS, you should make sure that all necessary preparations have been made.
This includes configuring the inverter via the web interface.
To integrate the system into the FENECON energy management system, please configure the following settings on your KACO inverter:
TL3 series
-
Settings ⇒ Network
-
Network ⇒ DHCP: Set to Off so that DHCP is disabled (This setting is necessary to ensure that the inverter can always be reached at the same IP address through the FEMS).
-
Network ⇒ IP address: Set an unused IP address in the address range of the router.
-
Network ⇒ Subnet mask: Set the subnet mask used in the network (default:
255.255.255.0) -
Network ⇒ Gateway: Set the IP address of the router as the gateway.
-
Network ⇒ Modbus TCP: Set the operating mode to On to activate the Modbus/TCP interface.
-
Network ⇒ Modbus TCP: Set the port to 502 (default setting).
|
The Modbus unit ID in the KACO PV inverter app must be set to '3'. |
2.1. Ping test
To test the configuration, we recommend pinging the inverter in the local customer network.
In the example below, the IP address 192.168.188.40 was set for the inverter in the configuration.
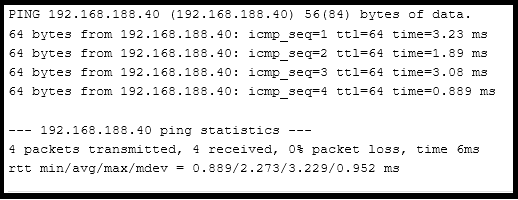
If the inverter cannot be reached via ping, check the settings in the Configuration.
3. Integrating the PV inverter into FEMS
After you have configured the settings on the PV inverter, you can integrate it into FEMS.
Prepare to install the FEMS App by following these instructions:
-
For the latest versions of FEMS:
-
Navigate to the main menu item
-
Follow these instructions: General Installation Manual for FEMS Apps.
-
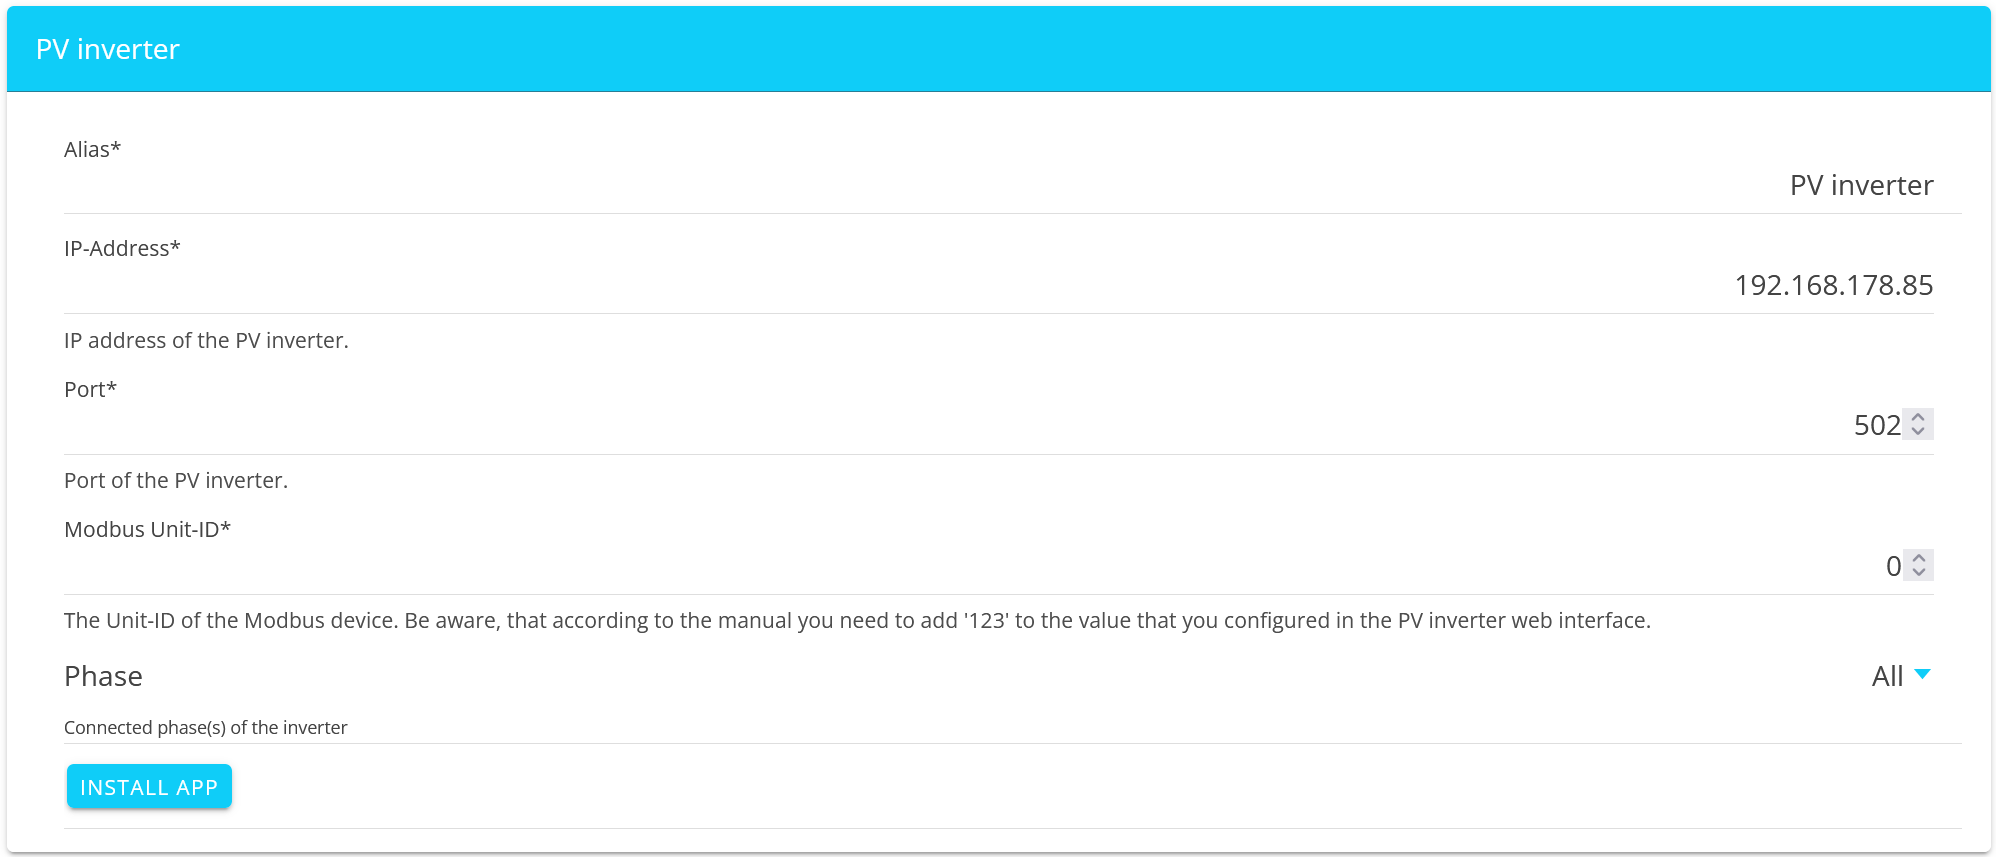
After entering the key, you will see the following screen:
|
Some of the input fields are pre-filled. The alias is the name under which the PV inverter is displayed in FEMS. You can choose any name you like, but it should be meaningful. Required fields are marked with an *. |
-
Check the IP address. You can find this either in the web interface of the respective PV inverter or in the list of devices registered on the router (e. g., Fritz!Box). If necessary, adjust the IP address so that they match.
-
The port should be set to 502 in accordance with the standard.
-
For the Modbus Unit ID, if a value has already been set in the PV inverter’s web interface, 123 must be added to that value. Enter this result as the Modbus Unit ID in FEMS.
-
Finally, specify which phase(s) is/are connected to the PV inverter.
Complete the installation by selecting INSTALL APP.
The integration of the PV inverter into FEMS is now complete.
You will then find the integrated PV inverter as a submenu item under Production in the FENECON App.